Make T-shirts like a Professional
Do
you like sewing clothes as much as we do?
Then you would also like to
make your own T-shirts ...
That is possible, it is not
difficult!
Below I explain how it works.
You need a
few things:
- polyester sewing thread, not
thicker than thickness 100
Tricot or Jersey?
These two names
are used interchangeably to indicate knitted fabrics.
Jersey
is an English word for fine knitted fabric in right-left binding (1
right-1 purl), also called Single Jersey. The name comes from the
English island of Jersey that lies in the channel between the United
Kingdom and France, just off the French coast.
Tricot is a
French word for machine-made fine knit fabric. The garment made from
jersey is also called jersey.
For both Jersey and Tricot, the
raw material (cotton, viscose, rayon, etc.) of the fabric does not
affect the name. Which is the case with, for example, Boiled wool
...
To work!
The trick with working
with stretchable fabrics is not to pull on the fabric when it is
under the machine. Sounds logical, I know! But you pull so easily
that you often do not realize that you do it. Unfortunately I speak
from experience ...
What helps is to place a walking foot
under the machine. Then the fabric is transported above and below at
the same speed. If you don't have one, try to sew Soluvlies tape with
every seam (on the top and bottom of the fabric). That is more work,
but the result just a good!
The yarn
Take
well-twisted polyester yarn. That is smoother and will break and roll
up less quickly. The thickness of the yarn is preferably no thicker
than thickness 100. That is the thickness of normal sewing thread.
For thin knit, I like to use thinner yarns, such as
Alterfil. The
great thing about this yarn is that it has a thickness of 150, is
well-twisted and even has a little bit of stretch!
The
needle and pins
There is still some debate about this. One says
this and the other says that.
The correct needle for sewing
tricot / jersey remains the Jersey needle. In the article
Stretchablefabrics you will find more info about this needle.
The
pins must be sharp and burr-free, in other words: good quality. Also
consider the thinner pins of
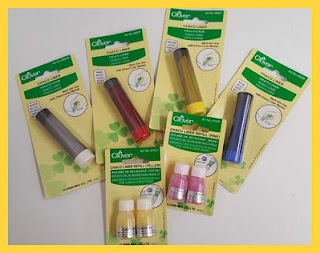
Clover
The Stretch stitch
This
stitch is on almost all sewing machines nowadays. He looks like a
lightning bolt. The great thing about this stitch is that it has some
give.
This keeps your seams a
little stretchy, and the yarn does not break when you put on the
shirt.
The twin needle
The twin needle for the hems
of the sleeves and body. See also the article
Versatile Solufleece Tape on this.
Now we can start!
Take
a pattern from a T-shirt. You can draw a pattern yourself or have it
drawn for you. The advantage of this is that the fit is good. If you
don't have that option, take a ready made sewing pattern and check
carefully which size suits you best.
Now we will draw and cut
the pattern.
Then we need the
material.
Before I cut anything out of fabric, I will always
wash the fabric first. Natural fibers tend to shrink a little. It is
a shame if your beautiful new T-shirt has become too short right
after the first wash. What I find most convenient is to pre-wash the
fabric in the same way that I do when it has become a garment. So if
I wash at 40 degrees and I throw it in the dryer, then I also do 40
degrees during the prewash and use the dryer. This way I know for
sure that things will not go wrong later.
We place the
freshly washed fabric on the table with the right side down. Then I
fold both sides of the fabric inwards so that I get two fabric
folds.
Then I will place the
front and back pattern pieces first. I place it against the fabric
fold opposite each other, pin it and cut it out.
The
sleeve is a different story. For this, the fabric must be folded in
half (as it is in the store).
Place the pattern on
the fabric, especially with the sleeve you have to pay attention to
the straight grain. The grain runs from the top down in the middle of
the sleeve. Lay this line parallel to the side of the fabric. And cut
out. If the straight grain is of, your sleeves will turn when you
wear it, I have experienced it myself and believe me it's not
comfortable ...

To cut with a rotary
cutter.
I hear you think a rotary cutter? Yes, a rotary
cutter! The knitted fabrics are often difficult to cut with scissors
due to the stretchiness of the fabric. It's easy to damage the fabric
with the tip of your scissors. Also you lift your fabric a little
when you cut and get uneven seam allowances that way. I find it much
easier to use the rotary cutter. Place a cutting mat on your table. A
cutting mat of 60 x 90 cm is ideal for this, because you don't have
to move your fabric around on the mat. When the pattern pieces are
pinned, you simply cut out with your rotary cutter!
Now
you have laid the foundation. Now the sewing starts, or actually the
basting. If you are not so handy with sewing, I recommend basting.
This way you know exactly how much seam you have cut and where the
points are on the pattern that should come together. This prevents
your garment from hanging crooked or becoming too spacious or
becoming too tight.
Tip: baste just next to the pattern,
so that you can stitch just inside the basted line. Then it is easier
to pull out later.
Finally we can thread
the sewing machine and put the walking foot on.
Sewing
now starts with the shoulder seams of the front and back panels.
Because the material is stretchy, and we do not want the shoulder
seam to stretch while wearing, we stitch a lace tape in the
shoulders
This is how it looks.
Instead of Lace Tape, you can also iron on Bias Tape or Edge Tape in
advance to stitch through later. The point is that the tape you use
does NOT stretch.
After the shoulder seams, the sleeves
are up. Make sure you get the right sleeve on the right side. Sleeves
are not entirely symmetrical. In general, the front of the sleeve (to
the left of the straight grain line) has a slightly lower bend and
the back has a higher curve. Compare it with a spoon: the concave
side is the front sleeve, the convex side is the back sleeve.
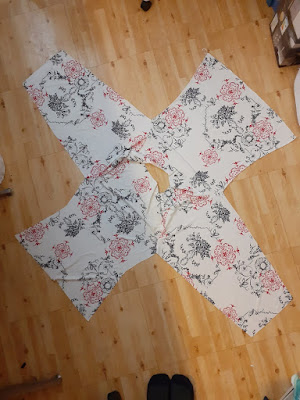
After sewing in the sleeves
it looks like this:
Then it is the turn of the
side seams. Sew the side seams of the panels and the seam of the
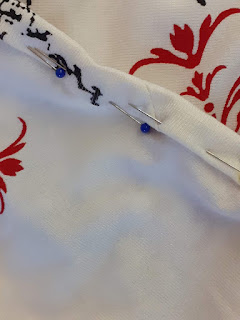
sleeve in one go. For this I pin the point where the sleeve is
attached to the panels. On the photo you see the "intersection".
Now it is starting to look
more like a T-shirt!
If you are not sure about the
fit, now is the time to put on the shirt.
Tip: Before
fitting, it is wise to stitch through the neck with the stretch
stitch.
(Even if you only wear it for a short while, the
fabric will stretch. Then the neckline can sag. This is almost
impossible to correct and especially difficult when finishing the
neckline.)
The hem
Pin the hem into the fabric,
fold three centimeters. (Slightly over one inch) Check if the hem is
correct. To do this, hold the shirt up at the shoulder seams. You can
also put it on and ask someone to see if the hem is straight. If you
are satisfied, we will fix the
Solufleece Tape on both sides of the
hem and pin. The next step is to baste the tape. Baste 2.5 cm (one
inch) from the side. You can draw a line on the tape with an
Aqua Marker or a
Tailor's Pencil.
 |
hem with Solufleece Tape basted on
|
 |
| hem with Solufleece Tape and stitching line |
After basting we will sew
with the twin needle. If you want to know more, check out our blog
article
Versatile Solufleece Tape
The stitched hem
with the Solufleece Tape looks like this:
Once washed:
The
sleeve hems are now done in the same way.
Now comes the best
part!
We're going to finish the neckline. For this we cut a
strip of fabric. Can be straight, the fabric already
stretches.
Tip: If you wish to use this finish with a
non-stretchable fabric, the strip MUST be cut diagonally!
The
size of the strip: 4 cm wide. The length is equal to the neck opening
(measure with the pattern) minus 10%. So if my neck opening is 57 cm,
then 10% (5.7 cm) is deducted and the strip will be 51.3 cm long.
 |
| go along the ruler with a rotary cutter |
 |
| put the ruler on the fabric |
 |
| nice straight cut strip |
 |
| remove the unnecessary material |
After we have cut the strip,
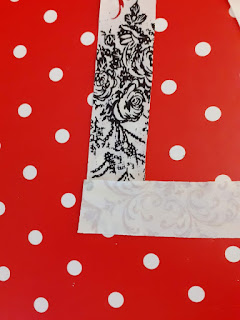
we are going to make it into a circle. So we lay the strip with the
right side of the fabric facing up. Then we take one end of the strip
and place it at a 90-degree angle with the right side down on the
other end. (good side to good side)
 |
| Ends of the strip |
 |
| ends of the strip superimposed |
The reason for slanting the
strip is that if you sew it straight and then double fold it, you
have the seam in one place. A thickening occurs in your neck. With
diagonal sewing you shift the seams and there is almost no
thickening.
 |
| you see that the seam runs diagonelly |
Then we pin the ends together
with the pin at an angle. The following photo shows how. I always
check if I have set the pin correctly by straightening the strip.
Then I stitch as I pinned,
exactly from the corner of the upper end to the corner of the lower
end.
 |
| pressed it looks like this |
 |
| now cut the tip off |
Then we pin the strip on
the neck opening.
Divide the strip into four
equal parts, the simplest way is to place the strip on the table and
put a pin on both ends. Then you place the pins together, so you have
two new ends to put a pin in. Voilà, four parts. The same applies to
the neck. Place the shoulder seams on top of each other and place a
pin in the center front and center back. Then lay the pins together
and pin both ends again.
Now you have a strip with
four pins and a neck with four pins. Now pin the strip with the right
side of the fabric on the inside of the neck opening. Place the four
pins of the strip on the four pins of the neck. If all goes well, the
strip is now slightly shorter than the neck.
 |
| strip pinned on the inside of the neck opening |
You now stretch the strip a
little to make it fit in de neck. We only reduced 10% so it shouldn't
be too much. If we take out more, the neck will wrinkle. We do prefer
a nice smooth neck ... right?
Then stitch the strip to the
neck.
Now fold in half of the strip and again over the
just stitched seam. Pin in place
 |
| fold in half of the strip |
 |
| pinned strip |
 |
| fold again over the stitch seam |
Then we will stitch it.
and then the T-shirt is ready!
It should look something like
this:


